Monday, December 19, 2016

Composting Activity for Kids

Introduce Composting to Toddlers


Don't hesitate to teach big concepts to your little ones!  When I was teaching toddlers a few years ago in a Montessori environment, I found no reason not to get down and dirty with composting.  This activity is certainly messy, but it was totally worth the efforts.  Composting with your little ones offers an opportunity to contribute to caring for their environment.  After each child had the opportunity to dig into the compost, our composting moved outdoors to the garden in a covered bin that doesn't require the mess.  The point of this project was for children to use their senses in order to physically grasp the concept of how composting works.

My Compost Presentation

This project came about after I explained to my students why a potted annual plant died in the classroom.  A dead plant was a great way to introduce composting with a little presentation.  Below are the supplies I had ready to present during a group lesson in the toddlers studio.  This is just one of the many ways out there to go about such a lesson:

Material for Kids' Compost
  • One dead plant potted in soil or some dead leaves gathered from outdoors
  • Food scraps.  In our studio, fresh fruits or vegetables are offered daily during snack time and there are often leftover scraps. 
  • 1 plastic bin or open container 
  • 1 cardboard box that the bin could fit in (to keep the mess from spilling out onto the floor, especially if you are teaching indoors)
  • 1 large spoon, small garden hoe, or shovel
  • Just for fun: 1 back scratcher (that can be used as a" mini hand rake")
  • 1 watering can, a small pitcher or spray bottle with water (whichever you prefer your kids to make a mess with)
  • An additional bin for composting, i.e., if you are prepared to start composting on a regular basis.  If a large composting bin is not an option at your school, you could start small by using a plastic storage bin with a lid and drill some holes in it.  For more information, here is a tutorial I found on how to make a compost bin out of a storage bin.  We followed the tutorial and kept our bin in the garden area out back of our school.  
  • Kids' books with photos on composting along with a composting video found on the web.  I typically find my videos on youtube.  There are plenty of composting videos out there that would be appropriate for the kids.


The presentation can be a discussion, followed by library books on compost and video clips from youtube. Kids will begin to understand, especially if you begin the demonstration with this hands on activity. We talked about the dead plant, which also lead to giving the kids an opportunity to learn about the roots of the plant and how a plant grows, etc. We put the plant in the bin and began to break it down with our hands. Add dead leaves, or whatever you prefer, and give the kids a chance to get in there and help to begin the process of "breaking down." It's a messy project, but even just letting them get dirty once will help them to have a better understanding of how the process works.

LONGTERM: We switched to a local composting company after this project, and talked to the kids about the company so that they know exactly where their food is going every time they put it in their bin. Talk to your school about working with a composting company and typically they can offer a deal with big companies. We went with Tilthy Rich in Durham, NC and we've got our students routinely helping the environment by composting every day!

Thanks for reading along and learning about this simple (yet messy) activity that helps teach little ones to better understand a big concept that can benefit our world.

Cheers!
Angelique

Saturday, January 18, 2014

Teach Toddlers Flower Arranging with Artificial Flowers

Flower Arranging For Kids 

In our Primary studio at Indigo Montessori (ages 3 through 6), we teach flower arranging with fresh cut flowers for the kids to trim and arrange in vases.  It's a special activity that each child loves to do, since they participate in decorating the room, making a flower arrangement for another friend, and they are given the opportunity to get creative.  We wanted to offer something like this to our toddlers class and found that offering fake flowers can also be enjoyable and give room for creativity.


Teach Flower Arranging to Toddlers with Fake Flowers!
In our Pre-Primary studio for ages 1.5 to age 3, we like to prepare the children with a flower arranging activity that doesn't require cutting the stems.  We use those fake flowers such as silk, felt, or cheap fabric ones that you can get at any craft store or dollar store near you.  We offer glass vases in various sizes and show the kids how they can arrange the flowers in the vases to decorate the room.  The fake flowers work great, because there are so many opportunities for color combinations that work with seasonal themes.  For example, we may offer fake Poinsettias during the winter season and orange leafy arrangements for the fall.  Each month, we switch out our baskets of fake flowers and leafy stems for the kids to arrange.  The kids love to put out vases of their flower arrangements on the tables, on the window sills, and on the shelves.  It's a great lesson on care and respect for one's environment and it makes the classroom feel more welcoming.

 If you are unfamiliar with how we do things in a Montessori setting, a lesson is typically given before we offer something like this.  We want the children to treat the material with respect, but we don't want the kids to copy how we are arranging the flowers.  So be sure to point out how each arrangement is different and unique in it's own way, and the kids will take more pride in their personal arrangement.

Thursday, November 28, 2013

Lesson on Child Poverty

Happy Thanksgiving, Everyone!

This week, instead of having my students (between ages 3 through 6) make some cookie-cutter Thanksgiving crafts such as turkeys, I planned lessons on child poverty. So many kids these days take everything for granted and don't realize how good they have it. My students are pretty respectful in class, but once in a while, parents come asking for advice, because their child is being disrespectful and selfish at home. I was inspired to teach about child poverty to give my students something to think about during their holiday break... 

Lesson on Child Poverty

First, I asked each child to share about what they were doing for the holidays. They all talked about "Thanksgiving" and how excited they were to eat turkey, play with toys, etc. After a few more discussions to prepare them for what was coming, I played some videos. I wasn't sure how the kids would respond, but I was pleased to see how interested and concerned they were. They actually asked for "more" videos, and they all had so many questions afterward, hopeful that the children were getting help. 

Here is one of the videos that I showed that especially touched each child. I skipped passed the very beginning of the nasty carcasses, because I don't think the kids were quite ready for that yet... While the children in this video appear to have nothing, they showed a great respect and appreciation for what they do have, and make the best of their situation. Near the end of the video, I pointed out how nice the children play with only each other (no toys or playgrounds in sight). Finally, at the end of the day, when I asked everyone what they were thankful for, their responses were very thoughtful as they had a new awareness of how lucky they really are...

Video on Child Poverty By Good Neighbors

Saturday, August 31, 2013

Montessori Primary Classroom Lesson on Using Spacers to Place Material Neatly on Shelves

This Montessori lesson used in our Primary classroom helps children to place material neatly on shelves by using a spacer, a technique that I have recently introduced to my students.

This year in our primary Montessori classroom (ages 3 through 6), I thought that block spacers would be a helpful tool to keep the shelves from looking too cluttered, especially in our abundant sensorial area.  Using spacers is a technique that not only can help with keeping things tidy, but can help students to be more mindful that the material on the shelves has a special place.  Further more, this makes for a great lesson that the kids can enjoy in order to help care for the environment. 

 A lesson will definitely be necessary, but I would recommend for teachers to prepare the shelves ahead of time with this technique in order to decide what type of spacer will work best.  The size of your spacer will depend on how far you want your material to be spaced out.  Try out different building blocks as spacers to figure out what works best on your shelves and how much space you actually have to work with...

Preparation:
Before the kids arrive to circle time, shift some of your material on a shelf so that it is not evenly laid out.  In the lesson below, I chose the cylinder boxes.

Lesson on using Block Spacers
Point out to the children how the cylinder boxes on the shelves are not evenly placed on the shelf.  You could also mention that they look cluttered and show how it will might be difficult to pick up the box if another one is up against it.  Take your block spacer and place it against the left end of the shelf that you are rearranging and make it flush with the edge of the shelf, like the image below.  Slide the 1st cylinder box up against the block and toward the edge of the shelf.  Carefully show the kids how you can place your fingers on either end and slide the block spacer out without moving the cylinder box.
Next, gently place the cylinder block on the other side of the 1st cylinder box.  Show how you can make the block spacer flush with the edge of the shelf and then slide the 2nd cylinder box very gently up against the spacer.   Making sure that the 2nd cylinder box is flush with the edge of the shelf and spacer, you show the children that the material is flush with each other by swiping your fingers across the box and block.  Use your fingers to carefully slide the block out from in between the two boxes.  Be sure to mention how careful and slow you must be so that you don’t bump the boxes out of place. 


Repeat the technique with the rest of the boxes until your shelf is in order.   Once each box is evenly placed on the shelf with plenty of space in between, you can share a sigh of relief and mention how nice and neat everything looks on the shelf.

We used a spacer for the cylinder boxes on the top shelf and another spacer on the bottom shelf. If you look closely, I just left the spacers available on the shelves for easy access.  

You can explain to the kids how this helps keep the material in order and that it also helps to grab each box carefully from the shelf without moving other material out of place.  As for how the material is displayed, I like I like to bring the material to the edge of the shelf, because it is much easier to see the material, and I usually explain this to the child with a visual:  I might push some material way to the back of a deep shelf to show them how it’s not as easy to see or notice the material when it is pushed so far back.  

I tell my students that spacers are completely optional and that they can also use their eyes to try to line material up.  So far the spacers have been a good way to start the year off to help children to get to know the order of the classroom.  I only use spacers in the sensorial area at the moment and do not find it necessary in areas such as practical life and art, so it all depends on what kind of material you are using and how you want items to appear on the shelves. 

I hope this was useful advice to other teachers out there looking for ways to keep their classrooms in order.

Thanks for reading along and please drop a line and share with me any comments or suggestions!

~Angelique

Snack Time Presentation for Toddlers in a Montessori Environment

This snack time lesson was presented to students ages 1.5 to 2.5 at our Montessori school.  During the beginning of the school year, there is a lot to introduce to new students who are just learning how to help themselves.  Before we can expect them to prepare their own snack, we show them how to carry items on their own such as glasses, plates and trays.  It may take many lessons before we should expect them to completely help themselves.  This is just one approach that we like to use with children who are just being introduced our Montessori environment:

During the first week, we give simple lessons at circle time including how to carefully carry a glass plate with food to a table from the snack shelf.  Next, we give lessons on carrying a glass of water from the snack shelf to the table.  We show the kids where to place their plates, napkins, and glasses on their table mats.  After lessons have been given, we give the children the opportunity to begin the process of helping themselves.  It may be necessary to serve their snacks to them for the first week as you are getting to know the abilities of your age group.

 Once the kids have had some lessons, a teacher prepares snacks on glass plates placed on a shelf that is several feet to several yards away from the tables that they will be eating at.  After our morning circle time, the kids are excused one by one to find a set at the tables.  Once all of our students are seated at their tables, we all sing "thanks for food," and then children are excused two at a time to walk up to the snack shelf and carefully carry their plates to their table.  Of course, we have demonstrated how to carefully carry the plates to their tables prior to asking them to do so, as well as how to push their chairs under the table and so forth.  Once these children return to their seat with their plates, they carefully place their plates on a table mat.  Before sitting down, they may return to the snack shelf to take a glass of water.  The water is already poured into the glasses for them and they have previously had lessons on carrying glasses filled with water.  Once they carefully bring their water to the table and place it in the appropriate spot on their table mat (which is yet another lesson that they would have prior to helping themselves to the snack shelf), then they sit down and enjoy their snack.  Lessons on pouring are also given with small pitchers so that each child may pour more water for themselves if they want more.

This is just one approach to introducing snack time to youngsters.  In our primary class, the kids learn quickly to serve themselves completely.

I hope this helps.  Enjoy your snack!

Saturday, May 11, 2013

Mother's Day Tea Party Celebration


We had an early Mother's day celebration in our 2 through 3 year old Montessori studio this Friday, and it turned out beautifully.  The kids enjoyed having their moms or supporting family members join us for songs at circle time followed by snack time.  

If you are a teacher looking for party ideas and working around child sized tables, this set up may be a great option for you, too.  Instead of bringing in adult-sized chairs, we simply used floor pillows for adults to sit at either ends of the tables, while the kids sat in their child-sized chairs besides their moms.  Below is an image of the set up before we added decorations to the classroom.


The kids found their seats by looking for their bookmarks that they made for their moms, which were laid out in advance at the tables.  They drew pictures on the bookmarks, and then we added a photo of the child and laminated them.  If you decide to make bookmarks and have more time on your hands, you could also punch a hole in the top and add a tassel made out of ribbon or yarn.


In addition, our students also had some flowers that they made for their moms out of coffee filters. 


The kids each had 3 coffee filters that they drew on with marker and then sprayed the filters with water to make the colors spread.  Once the filters were dry, we put glue on each center, then stacked the filters and pressed the centers together.  Later on, I followed this great tutorial on Pinterest to put the flowers together:

I ended up using jewelry wire to bunch the flowers together and to create a stem.  I covered the stem with green electrical tape which worked out fine.  

Each child also made a card for their moms with craft paper, but I didn't get a chance to take a photo.  All in all, the celebration was a lot of fun and the comfortable environment made it easy for kids and parents to mingle and spend some quality time together.  

Have a great Mother's Day weekend, Moms!

Wednesday, March 27, 2013

Mix Up Some Glitter!

A fun work offered in our practical life area of our Montessori classroom


This is a quick and simple activity I have done with ages two and up, and it's great for the fine motor skills.  All you need is a bowl with water, a whisk, and a touch of glitter sprinkled in the water.  Give a lesson and show the kids how to use a whisk first, and let them stir up the glitter for fun.  


We added some food coloring, and the kids enjoyed observing and getting a closer look at the colors in motion.


Sunday, February 17, 2013

Educational Activities Made on the Photocopier

As a teacher, I am so thankful to have a photocopier at my school.  There are so many matching activities to be made on a photocopier, especially if you have colored ink available.  Here are just a few math works I've made for the kids in our studio.  There are truly endless activities out there with the use of a photo copier to help teach our children.

Matching and Counting Dice
Here, I photocopied different types of dice for the kids to match the numbers to.   

Counting and Sorting Buttons
Here, I laid all of my buttons out on the glass surface of the photo copier, shut the lid very gently so that I wouldn't bump the buttons, and once I got my good copy I added numbers along the side and laminated it.  This is a great tool for a sorting activity as well as learning to count.

Shape Making with Colorful Popsicle Sticks
Lay down some colored popsicle sticks on the photocopier and make different shapes to make cards for the kids to practice making shapes.  Glue the images on thicker paper and laminate them to make your cards last longer.  


Number and Quantity Matching
Instead of using dice, draw out dice cards, copy them in a row from one through 5 and laminate them for the kids to match.


I hope this gave you some new ideas for your classroom.  Thanks for reading!

Saturday, February 16, 2013

Valentine's Day Celebration

I thought I'd take a moment to share how our Valentine's Day celebration went in our Montessori studio for ages 1 through 3.  It was a special day indeed, especially since the kids were preparing for this holiday all week.  This week, the theme was on love and my co-teacher and I gave lessons on caring, sharing, and loving one another.  Our students were also offered a station in the classroom to make valentines for loved ones and for each other throughout the week.  They had so much fun and were so excited to see the decorated room on Valentine's Day Morning.

A welcoming entrance on Valentine's Day

The children made flower arrangements during the week for the tables on Valentine's Day.

Valentines made on hearts cut from craft foam for friends and family 

Marble Art Valentines

Our students enjoyed decorating bags by coloring on them and on gluing hearts cut from craft paper.

All in all, it was an exiting week for our students.  They especially enjoyed exchanging valentines with each other on Valentine's day.


Thanks for checking out our classroom on Valentine's Day!  Hope you enjoyed.
~Angelique Buman

Saturday, February 9, 2013

Wild Animals in Africa Activity Tray


I have found this activity to be enjoyed by children ages 1.5 through 6.  A great way to learn the shapes and names of our continents is to make activity trays that teach the children something about the continent.  Learning about wild animals can be very enjoyable for the little ones.  If you are a Montessori teacher or teach at a school that recognizes continents in different colors, this is also a great way for the kids learn the colors of each continent.


What You'll Need:
-A tray
-Craft foam sheets 
-Green Felt (Or whatever color you teach with to recognize continents in your program)
-Wild Animal figures 
-A bowl or container for the figures
-Scissors
-Marker or pen
-Sheet of paper
-Tacky Glue or another adhesive that works with felt and foam sheets 

Steps:
-First, glue your sheet of felt to a foam sheet.  Let it set to dry.
-Draw up your continent on paper the best you can or have a printed copy of it and cut it out.  Make sure it is large enough that all of the animal figures will fit on the surface.
-Take the sheets that you glued together, and put the felt side face down on a table.  Lay the cut-out shape of your continent on the foam, but make sure that the image is flipped or reversed as this is the back side that will be facing down in the tray.  Trace it with a marker or pen.
-Cut it out and there you have your continent.
I chose to put the foam on the bottom of the felt, to make it a little more durable.  It also grips better to the foam surface under it.

-Take an uncut blue foam sheet and place it at the bottom of your tray to represent water.

-Add the animal figures with a container or bowl and offer it to your kids.  
-You can add labels to the continent and for the animals, especially if you are working with an older age group.

A Montessori Note on Why I Chose to Teach Africa First
For you Montessori teachers and parents, I wanted to explain my underlying reason on why I chose Africa as the first continent tray to offer my students, ages 1.5 through 3, and not North America (which is the continent we live in).  As you may know in many classrooms, it is helpful to first teach the continent that we are from. I too agree and I do talk with the children about where we live, but I tend to break things down in different ways to reach a point.  During circle times, the kids were first shown a sand paper globe to recognize land and water, and then I began showing them the most typical maps and globes where the land is all green and the water is blue.  If you know your Montessori, you know that continents on a Montessori globe are all different colors to help the child learn their continents.  Africa is the color green on a Montessori globe, and since the kids are still learning the concept of land and water, I felt that this color was best for that as they begin to recognize continents.  This age group is very visual and they respond best to real and natural imagery (such as the most natural colors on maps).  Showing them the Montessori multi-colored map would be a little harder for them to understand right off the bat, but while many of the kids have grasped a better understanding of the earth we live on, they are being introduced to the concept of the Montessori multi-colored map.  


Introducing the Concept of Time To Children

Teaching Complex Concepts to Young Children
(Ages 1.5 through 6)

I find that even though most young children aren't expected to learn or understand lessons and activities that are not introduced until at least kindergarten, it's good to expose them to the material to help build an interest and awareness.  With a positive experience of being exposed to something complex, a child is often likely to better understand and appreciate the concept when it is expected of them to learn.  For example, most of us don't expect children of ages 1 or 2 to be able to read a clock, however if we offer the child clocks and other items for telling time, they just may build a curiosity and interest that will further their understanding.  Children may even show readiness to learn more!

The Time Basket

Below is a basket full of items I offered my Montessori students (ages 1 through 3) to start thinking about how time is read.  This basket has brought so much joy to the kids that I was encouraged to start adding new items and presenting more lessons!  I got the idea from another Montessori teacher whom I worked with in an ages 3 through 6 classroom, and it was a hit for the older kids, too.

"The Time Basket"


Found in the basket are random items I have been collecting to help teach about time.  During circle times, we have talked about how time passes into night and day, which is why I have collected some cool crescent moon plates and a model of a sun.  Other items that can be added or rotated include a one-minute sand timer, clocks, watches including digital watches, and pictures of clocks showing time passing from one o'clock through 12 o'clock.  The children are free to take this basket and explore during our work cycle.

Sand Timer Lesson

When I present this lesson at circle time, I point out the wall clock and take note of how quickly the second hand timer moves around the clock.  The kids watch how the second hand makes one round on the wall clock while the one-minute sand timer is going.  Beforehand, I ask my students to sit quietly and listen closely during the minute (and yes, toddlers are fully capable of this with the right kind of encouragement!).  Afterwards, each child takes turns sharing what they heard as the time passed (e.g. cars from outside, children from other classrooms, the classroom pet, etc).  My students absolutely love sharing about what they heard.   Once, a child told me that he could actually hear the sand timer, which was a little hard for me to believe, but I told him that he must have far better hearing than me! 

We recently purchased a two-minute sand timer and a three-minute sand timer  to add to the basket as my students continue to show interest.

If you are a teacher reading this and would like more advice on encouraging the kids to sit in silence while using sand timers, please contact me as I am happy to share a few pointers and tricks.  

Have fun with it!

~Angelique

Land & Water Sorting Tray for Toddlers

As a teacher using the Montessori Method, I often find myself teaching young children complex concepts in the simplest form.  When teaching children to understand land forms, maps and globes, we must find ways to make it fun and easy to understand.  I think about the most common and recognizable presentations and break it down into toddler terms.  For example, we know that water on most maps or globes is nearly always presented in blue and the land is typically shown in green.  This land and water sorting activity that I presented here is just one of the many ideas out there to help kids to begin thinking about the earth they live on.


There are many different ways to display a land and water sorting activity such as using actual water or photos of land and water to sort.  You can add air as a third sorting element when using photos, such as imagery of clouds and birds flying.  In general, it's good to have many different options to rotate for the kids to explore.

HOW I MADE IT:
It's simple.  I used a wooden tray from an arts and craft store, green felt for the grass and a glitter blue foam sheet for the water.  Optional: I glued the green felt to another piece of foam sheet to help keep the felt in place better.  As for the objects, I have a huge bag of sorting objects that I've collected over the years, but it's easy to find things like this at your nearest toy store or dollar store.  Some objects include fish, sea shells and trees.  On the inside wall of the tray I labeled land and water (and I added the labels on the opposite wall, so that the child is always bound to see the labels and start recognizing them as site words).


Sorting objects that are found on land or the water is a great start for a young child to start thinking about the many differences between land and water.


Thanks for reading as always!  Feel free to pin or comment!
~Angelique Buman

Saturday, January 26, 2013

Pushing Pins into a Pin Cushion Activity


Pushing pins into a pin cushion takes coordination and careful handling for ages 2, and sometimes up to age 6 or older.   This is a preliminary sewing activity that the students in our Montessori studio absolutely love.  It's an activity that is seen in many Montessori environments.  A very thorough lesson is given to children first before handling sharp objects such as pins.  We explain that if we are not careful, these items could be dangerous.  Many children also realize that in most cases, it is a privilege to use such objects at this age. They recognize that we are trusting them to handle this material properly and they take pride in that.  Of course, we are always observing them, but we find that they are most respectful to material that typically wouldn't be offered to them elsewhere.  This lesson teaches children safety and a respect for materials in the classroom.  In addition, it is great for the fine motor skills!

Extension for Pushing Pins into a Pin Cushion

After the kids have had some practice with pushing the pins in, challenge their coordination by adding beads.  Show them how to put the pin through the bead hole before pushing the pin into the cushion.


Tuesday, January 15, 2013

Make a Rainbow Basket for Kids to Explore

What child doesn't like learning about rainbows?  I have made baskets like this in classrooms for ages 2 through 6 and it is always a hit.  Discovery baskets are great opportunities for kids to explore on their own.  


Things you could add to your own basket
Note: Be sure to rotate out different items that you find related to rainbows, and don't add too much material at once if the children don't have the space to explore.  I find in the Montessori environment, sometimes a few items are better than a lot, so that the children can spend more time absorbing the material lessons.  Once they have had enough opportunity to learn from the basket, it may be time to rotate new material that teaches about how color works.  For older kids or as children advance, you can start making separate baskets that are focused on different areas of color, such as a color basket that teaches about the painters pallet and color wheel, and another basket that teaches about light and color.  

-Rainbow Exploration Cards: Surf the web and print off available images of real rainbows, colors, diagrams of how light and raindrops work to see rainbows, and don't forget Sir Isaac Newton (who used prisms to show that sunlight was made up of the colours of the rainbow, etc.)!  Oh, and be sure to have an image of an airplane view of a rainbow so that the kids can learn that rainbows are actually round when we can see the entire rainbow is in view.  Laminate the printed images to make them last longer.  If you don't have a computer available to find images, start saving rainbow and color clippings from magazines as well as samples at local paint stores.

-Prisms and Color Paddles:  You can get a small prism for pretty cheap on Amazon and those translucent color paddles are great for holding up to the light.  Just Google "color paddles" and search through images if you aren't sure what I mean by those, as they are usually the first thing that pops up.  An old CD also could be added so that the kids could see how the rainbow colors on the reflective side.

- Color Sample Swatches from your local hardware store.  If the swatch books aren't available like I have here, you can gather several color strips in the paint section and make your own book.  Just stack them together, hole punch each of them one one end, and add a key ring or string to keep them together.

-Make a Felt or Laminated-Paper Rainbow Puzzle: Search for a rainbow coloring page on the web and print out an image or just draw one up yourself. Cut each arch out to create a stencil for your rainbow puzzle. Then place each layer of the rainbow on the appropriate sheet of colored construction paper or felt sheets, trace each arch and cut them out.  Put the rainbow arches together and glue the entire rainbow to a piece of poster board.  Cut the rainbow out, but do not cut it into sections just yet if you choose to make a rainbow out of construction paper.  I would laminate it first or use clear packaging tape if you don't have any laminating paper.  After it is laminated, you can cut each ray out and add it as a rainbow puzzle to your basket.  If you use felt, you can simply cut each arch out and there you have a rainbow puzzle.  It won't be easy to make it perfect, but it will be good enough for the little ones.  You may want to use foam paper instead of poster board for the felt if you want it to last a little longer.  I find that felt sticks really well to foam paper, especially if you use elmer's adhesive spray.

-Make a Braided-Yarn Rainbow Puzzle: Buy yarn in all of the colors of the rainbow, cut 3 long strands from each ball of yarn and start braiding.  I suggest braiding all colors very long at first, at least 2 feet long so that you have plenty of yarn to figure out what size you want your rainbow.  Lay them straight next to each other in the order of the rainbow with the red at the top, and then trim each one shorter and shorter, making sure that the red stays the longest and the indigo/purple is the shortest.  Depending on how long you are keeping the red, you may want to cut at least one to two inches off of the next one and so forth. It is important that the kids see a different of length if you are trying to teach them about the spectrum of color rays.  Save room for knotting each end and then you may want to trim the ends up so there is not too much fraying.  I actually bought a bundle of yarn called "rainbow yarn" to do this, so that might be another option if you don't want to buy each individual color.  When you are all finished, you can show the kids how they can stretch the braids out to learn how red is the longest ray of light, and how each ray gets shorter and shorter.  Yes, children can learn elementary and middle school level material, too!  Afterward, show them how to arch each color into a rainbow like how I did in the image above.

These ideas may or may not fly for some kids, depending on what they are interested in, but I'm sure they will find something fun in the basket...

Thanks for tuning in and I hope you learned something!

Sincerely,
Angelique

Monday, September 3, 2012

How Rugs & Place Mats Can Teach Children Order & Personal Space

In educational settings where children are learning with individual & small-group based material, particularly in Montessori learning environments, you may find children utilizing small roll-up rugs, carpets and sometimes placemats.  So what do we use them for?  Here are some benefits I have seen while working in Montessori settings for ages 1.5 through 6:

Help keep the Learning Environment Tidy by Defining Personal Space
Offering roll-up rugs for the floors and placemats on the tables for children to place their work on can help the room stay neat and tidy.  This also helps a young child define personal space as other children learn not to grab from other's work space or walk on someone's rug.  I've also seen less children tripping or getting hurt as they begin to recognize where it is safe to walk, instead walking through an obstacle of scattered toys and materials on the floor.  Once a storage location in the room is determined, the child is taught to return the rug or placemat just the way they found it (after given a lesson on how to do so).  We keep our rugs in a floor basket and  placemats in a basket on a shelf that the children can reach.  The placemats and rugs below were rolled by ages 1.5-2.5.  We just started the school year two weeks ago and our students have adapted quite well to this approach.  

Placemats are offered to children to place their work on when they choose to work at a table.

Small roll-up rugs are offered for children to place their work on if they choose to work on the floor.

Build Fine Motor Skills
Lessons are given to the children on how to carry mats and rugs, how to roll them out, roll them back up, and return them to the bin.  When lessons are given carefully and thoughtfully, you give the child time to process and notice details.  This can really be a challenge for young children and it is okay if they do not perfect it right away.  Just let them do it the best they can at first and don't discourage them or point it out so much if they aren't rolling them perfectly.  Lessons during circle times or small groups may need to be given multiple times throughout the school year to help remind children the best way to care for them.  Your students will have plenty of opportunities to practice throughout the day as they choose different material to work with.  If you are interested in how a lesson like this might be presented, I found this video where a woman is showing a student how to roll a rug.  It's a little bigger than the kind of rugs we use in our room, but it gives the child time to notice the woman's careful finger work:

There are some additional details you can point out when rolling a rug, for example, take note of what happens when a rug is not rolled evenly.  Sometimes you can simply pat either end of the rolled up rug if it is not too uneven.  

Learn to Create Order & Build Organizational Skills
In our Montessori Studio, the teachers show the children lessons on a variety of work material that they may take from the shelves and bring to their table mat or rug to work on.  They begin to learn order as we typically show them how to lay out material from left to right, or by taking out the items that we will be using first.  For example, if there are matching cards, they might be shown to place the first set of cards, one at a time from left to right, in a straight order.  When the children are shown how to carefully utilize the work from left to right or by placing the work in the order that you would use the material, they are learning organization and order, which will also begin to help them when it comes to reading and writing (as in most countries we learn to read and write from left to right).

A child using a placemat to keep her work on at the table

A child using a rug to lay out matching cards from (her) left to right

Thanks for reading.  Please feel free to comment & ask questions!

~Angelique

Wednesday, August 29, 2012

Basic Transferring Activities for Children's Fine Motor Skills

Here are some photos I recently took of some of my very basic transferring activities that I have prepared for children who are recently just beginning to do transfers in our Montessori classroom.  They are having a lot of fun with this work and my co-teacher and I are already seeing a lot of progress in concentration and coordination.  Typically this work is great for ages 2 through 6, but older children can also benefit from it, especially if they have never been given the opportunity.  If you are interested in making your own material, most of the material in the images can be found at your local craft stores, dollar stores, and bargain stores.  If you are new to this concept and interested in learning more about preparing your own material, I have shared some additional information at the end of this post.  

For beginners who are just learning to grab, try some big bells to add a jingle to the work.

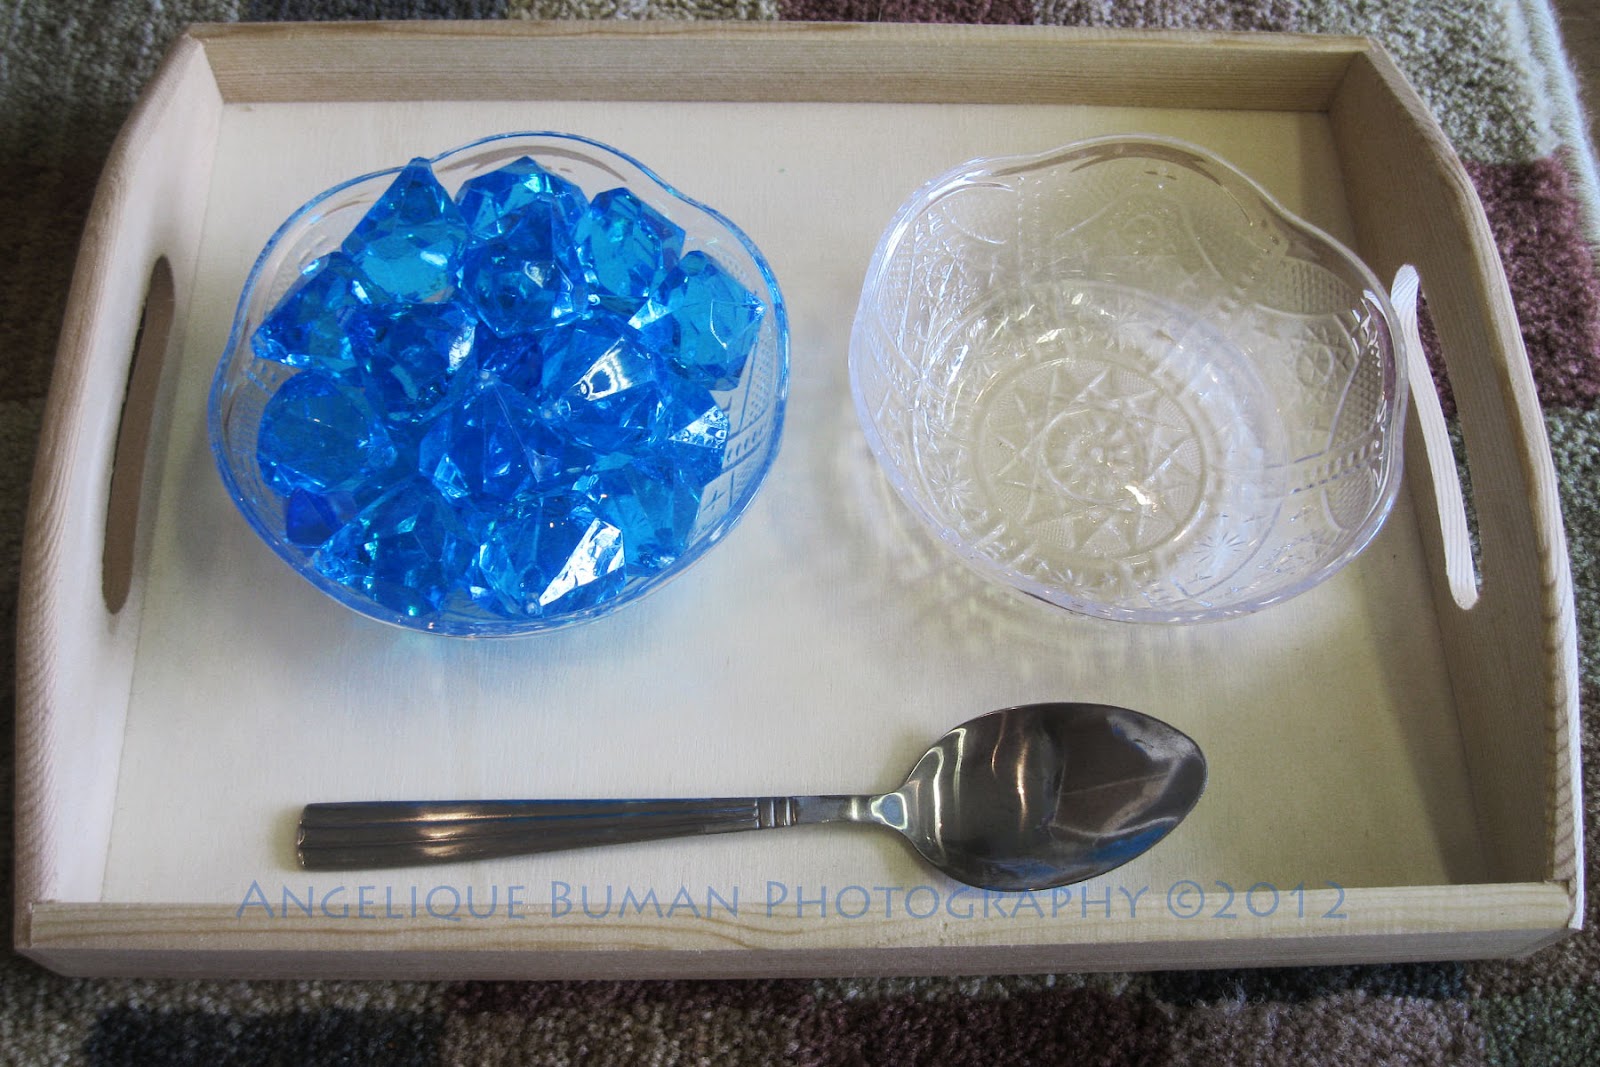
The children enjoy the "ting" sound that the plastic crystals make when transferring into a glass dish.  

Add more crystals and change out dishes to add new interest to the material.

Adding dry food to the mix seems to help kids feel productive, as if they are helping out in the kitchen.  

Change up the bowls and offer different sized beans and spoons to challenge the children.

Once children have mastered transferring one bowl to another with a spoon, you could add two smaller dishes for them to work on dividing up the objects.  

About Transferring
 For those who are hearing about this for the first time, transferring activities are great for children to start building fine motor control for specific skills.  While the process helps children to focus and gain coordination and control, they will also gain skills that will benefit them as they begin to learn more complex tasks such as writing, caring for themselves and the environment.  There are countless activities for transfers that often include different variations of transferring small objects from one bowl to another.

In a Montessori classroom, there is a strong principle that Maria Montessori called the "control of error."  After repeating the activities over and over again, children often learn to correct themselves on their own.  To learn more about "control of error" and other Montessori terms, click on the link below to a great website on Maria Montessori and her methods:

Lessons are often provided to children first before the child does certain transferring activities on her or his own.  The teacher shows the child how to do the transfer, returning everything back to the original dish. The lesson is done slowly and carefully to allow the child time to observe. Below is a tutorial video I found that is a great example of how one transfer lesson is carefully demonstrated. 

Thanks for tuning in.  Feel free to let me know if you have any questions or comments.

~Angelique

Sunday, August 26, 2012

Simple Activities for Kids Offer Opportunities for Growth

Expensive material and excessive amounts of toys can be good for motor skills and sometimes for learning, but it's not the only answer to educating young children.  Besides, not every school, daycare program and educator can afford to offer abundant amounts of toys.  But that does not mean we educators cannot offer children opportunities to have fun with education.  Sometimes a child can show more appreciation for simple material and activities that are not necessarily considered toys.  There are so many life-skill activities out there that offer endless opportunities for children to learn and grow.  And say you do work at a school that has a large budget-- It can actually be worth spending money on more intricate and unique material than the popular tinker toys and the latest plastic cubby system to keep them in.  Sometimes offering smaller proportions of individual based work can really help a child to focus on exploring, focusing on and perfecting the activity.  For example, there is no need to offer hundreds of Legos or blocks to one child when they can be just as absorbed when given a handful.  Of course, children need to work on social skills too, so be sure to offer a number of activities for 2 or more children in addition to individual activities.  I have posted just a few activities that I have used in my classrooms below.  These are mostly ideas that have already been presented through the Montessori Method of teaching, but they are universal activities that many other educators have adopted.  If you are interested in actual Montessori lessons and presenting material in this method, there is information all over the web (if you just Google Montessori lessons or search on Pinterest!).  Below are some basic ways that anyone can use and create material in nearly any educational setting.  

Geometric Solids Activities

Here, we offered just a small bag full of geometric solid shapes for one child to work on.  Present items like this in a pretty bag or nice basket to draw interest to the material.  Depending on what you want the child to learn, you could allow the child to build constructively with the material, and/or offer them matching cards of each geometric shape.  If you have the opportunity to sit with the child, you could start teaching them the names of each geometric solid.  You could photograph the shapes and make your own matching cards by laminating them.  If you are interested in purchasing Montessori cards, this website shows examples of what a Montessori educator might use:  3 Part Geometric Solid Cards.  If you are interested in purchasing the actual Montessori geometric solids, here is a link (just scroll down and you will see them in the color blue): Montessori Material

Sifting Activities


This activity is always a hit with ages 2-6.  Here a child is sifting through the sand, trying to remove the larger objects in the mix.  You could add beans, seeds, corn kernels, or beads, but be sure to follow your program policies as some of this material may be considered a choking hazard and not acceptable.  Give a lesson first, slowly, quietly and carefully.  To present this material, place two bowls on a tray, the first bowl filled with sand mixed with the larger objects. In the second bowl, the sifter can be placed.  Carefully demonstrate how to scoop with the sifter, shake out all of the sand and then dump the remaining objects into the empty bowl.  Once all of the objects are removed, pour them back into the dish with the sand (while using both hands to pour if you want to emphasize on being careful not to spill).  A spoon could be added to the tray for the child to mix up the objects in the sand, preparing it for the next child, or they can simply repeat the activity.  You can make your own variations of any of the work presented here.  In the Montessori Method, this would be considered a "practical life activity" as it is helping build fine motor skills, order, as well as the multiple uses of a sifter.  We find that the more carefully, slowly and thoughtfully you present the lesson, the less likely the child will use it improperly (like putting objects in their mouth).  

Magnet activities

Offer a dish of magnets for a child to explore on their own just how magnets work.  You could demonstrate a simple lesson on how to use them, showing the child how magnets can push away or pull toward each other.  However, a lesson may not be completely necessary if you would rather have your students discover these things on their own.  You don't need to explain the science just yet, but feel free to make extensions of this lesson if a child is ready to learn more.  A fun extension we use in the Montessori Classroom is to have a variety of magnetic and non-magnetic objects in a container. For example, you might have a paperclip, wooden cube, rubber duck, refrigerator magnet, sea shell, and a large bolt or screw. Offer one large magnet and two dishes so that the child may sort through the material by placing nonmagnetic materials in one dish and magnetic materials in the other dish.  You could also extend this activity with name cards to label the items as magnetic and non-magnetic, depending on what the children seem ready for.  Here is a website I found on the magnetic/non-magnetic activity I just explained: magnetic & nonmagnetic activity

World Map Books & Traveling Maps

Even our toddler class loves a good book of maps.  Kids love to pretend to be navigators and offering them maps is a great way to explore.  If you have any old National Geographic magazines laying around, flip through them for maps that the children can unfold and lay out on the floor. Young children don't need to understand the details of the map right away, but you might want to point out just a couple details like roads, rivers and mountains to help them to start noticing all of the different symbols.  Magnifying glasses can be offered so that the children can take a closer look.  I have especially noticed that children in my classes have enjoyed this activity while working groups of 2 or 3.  We have a small globe in addition that the kids also enjoy.

Peg Board Activities

There are all sorts of activities a child can do with a peg board.  Depending on what kind of peg board you can find (sometimes found at craft shops or you could make your own with a board and nails), you could have the child put beads and rings on the pegs, or elastic hair bands (like the child in the above photo).  Kids in my previous classes have really enjoyed the elastic bands as they work to stretch the bands across the board in different ways.  This is a great activity to work their fine motor skills.  Again, please check with your program policies before offering this material and give a lesson as it will help discourage poor behavior

Hand Broom & Dust Pan Activities

Oops!  A child accidentally spilled the sand sifting work, but it's no big deal, because he can help clean the mess with a hand broom and dust pan.  This is certainly not an easy task, but if you just offer the material for the child to try, it will likely help the child to feel helpful and more responsible.  If the child does not sweep everything up, encourage them that it's okay as this takes lots of practice and children could easily be discouraged with too much pressure.  This is a great lesson for caring for one's environment and there are some simple extensions you can offer a child to help with their coordination.  If you are interested in a Montessori extension, I found a great blog that shows the steps on how to prepare for an activity:  http://elainengfriis.blogspot.com/2011/08/montessori-acitivity-swiping-with-brush.html

In our studio, we also have a child-sized broom and mop.  The kids especially love to clean their own water spills with the mop.  

Thank you for tuning in to learn new ways to help educate today's young pupils.  

~Angelique